Showing posts with label 4th grade. Show all posts

Sunday, July 1, 2012

Architectural Sculptures


As their last project for the year, students in 4th Grade created sculptures that were based on geometric forms and architecture.


First in order to begin thinking about architecture and public sculpture, I showed the students several slide shows of how sculptors and architects use drawing and collage to sketch out and play with ideas.  

Next, I xeroxed drawn forms, as well as pieces of architectural structures such as domes, arches and columns. Students then added to and combined different aspects of the xeroxes, in order to create an idea sketch for a new building or public sculpture.


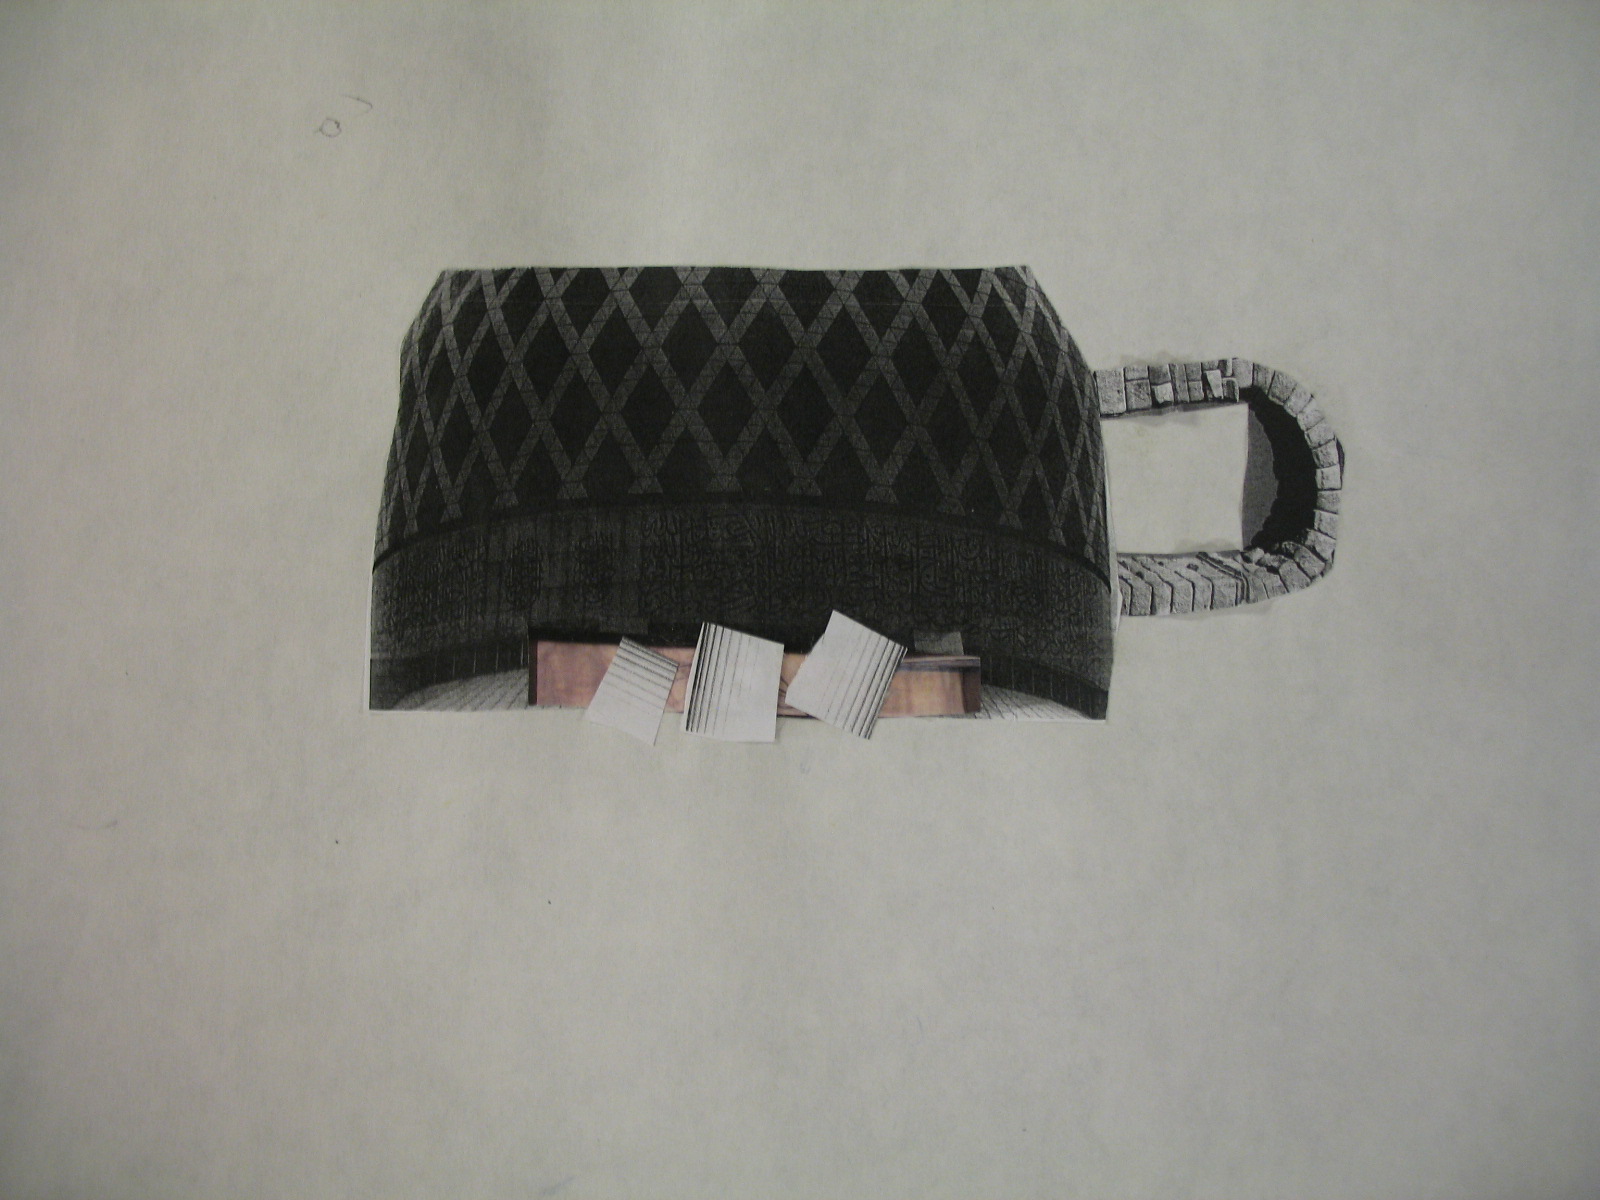
This student's idea and building design is based off of the form of a mug. He combined a dome and an arch, and cut up some columns as well.

Next, students chose one of their sketches to base their sculpture off of, and began building using cereal boxes and found forms such as paper towel tubes. They also had to include at least one geometric form (cube, pyramid, cylinder, or rectangular prism), which was built using a net. They traced this net and created their form, getting practice that helps reinforce concepts on the ISAT math test. 


After building all of their forms and joining them with masking tape, students were taught about paper mache, and how it is a great permanent attachment tool.   
Students added paper mache (glue+paper pieces) to secure the places where two forms connected.


You can see how this student utilized many found forms.


Next, the students and I talked about how architects need to really sell their idea to contractors and the public, before it can be realized.  In order to do this, they add "skin" to the models they have created, to give their audience an idea of the colors, textures, and building materials, that will appear on the building.

Students had access to acrylic paint (painting station), as well as many other materials in the sculpture studio, which they selected to show what textures and colors they wanted on their public sculpture/building. 

I forced all of the students to apply a base coat of paint to their sculpture, before gluing on extra materials such as paper, feathers or fabric.  In this way, the cereal box labels were covered up, and the overall craftsmanship was better.


I would love to see this sculpture larger than human size, downtown in Grant Park!  
I like how this student used the rubbing (texture) plates we had in an innovative way.  They embossed tin foil which was not a demonstrated technique. Yay for coming up with your own solutions!

In the end,  I think most students chose the materials they did for "skin" because they looked interesting or pretty, and not because these were real textures they would want on a building.
However, the resulting sculptures were pretty interesting and for the most part, the students liked their sculptures and were motivated to finish them.
It was also interesting for both the students and myself to see how their sculpture changed and morphed from their original design/collage.  This mainly happened because the students discovered that some things were too difficult to construct or attach in the time we had.

This student added cardboard people to show a sense of scale and building usage.
This student, Brody,  wanted to use organic forms to create their sculpture. They formed an idea without using collage and used drawing and imagined forms instead.  Although they ran out of time to truly add skin in a well-crafted way, their structure was huge and really well constructed and thought-out!

Brody's sculpture before adding paint and "skin"


This student used paint, wall paper, feathers and ribbon for skin.  I really like the novel use of straws as walls.

Sunday, April 1, 2012

Introduction to Sculpture

Students in grades 4, 5 and 6 were introduced to sculpture through both a slide show of sculptures and a one-day sculpture challenge. 


 First, we looked at many different sculptures and discussed the difference between 2-Dimensional art and 3-Dimensional sculpture.  Sculpture asks an artist to consider all sides and angles of their work.  


"Swing Set", representational sculpture by 4th grader


 Next,  we learned that sculptures can be representational or non-representational.  Students have since been using these art terms to describe other things we are looking at in class.  It is great!


Non-representational sculpture by 5th grader
Non-representational by 6th graders

At last we got to the art making itself, and students were given the challenge of creating a representational OR a non-representational sculpture using only brown paper (crumple or twist), string, cardboard from cereal boxes and tape.


                            The results were quite diverse.


Representational sculpture of "ice cream" by 4th grader


Post-It to the Puppets

Students in grades 3 and 4 displayed their finished puppets on the art tables, and walked around the room to look at each others work.  Next,we talked about complements, and how artists deserve specific complements that let them know what they did well and could repeat again on another piece.  


Some things the students brainstormed they could write about were: the way the puppet was put together or the way it moves (engineering), the details of the puppet in color and texture, the creativity in character design, and the neatness (craftsmanship). 


Students then walked around the room and left specific complements on post-its for their peers, next to a particular puppet.  The students loved doing this and many of them asked for more and more post-its to write on.  One class did not stop for the entire class period, and spent 30 minutes giving complements.  At the end of class, students headed back to their seat and read the complements that were left for them.  We made sure as a group that every puppet got some feedback.
Here are some more pics of the finished puppets.  
I will post a link to the youtube shadow shows once they are all filmed. 

Sunday, February 12, 2012

Finishing Our Shadow Puppets

Students in the 3rd and 4th grades have now added color and details to their shadow puppets, making them enticing art objects as well as fabulous shadow play.  They chose either colored pencils, markers or both to bring their characters to life.  


A completed donkey puppet created by Alexander in 4th grade,  next to his original drawing and design.


Next, they joined each of their separately drawn and cut pieces together, using paper fasteners.  Next week, students will add the dowel rods to their puppets and begin rehearsing movements that tell the story of their folktale. 


A completed bird puppet by Alicia in 4th grade. 
Many of the puppets came out absolutely superb from the standpoint of successful engineering and design, as well as beauty and characterization. 
I will be posting more pictures of both the puppets and performances soon.

Here are links to some of the performances:  More to come!
http://www.youtube.com/watch?v=1jx7NAOYcwk&feature=youtu.be 

http://youtu.be/6Nm5qkKbqMQ

Saturday, January 21, 2012

Designing Puppets Based on Folktales

After creating practice puppets to understand how shadow puppets are put together, students in the 3rd and 4th grade are now creating shadow puppets of their own design based on folktales and fables.  We are using Rudyard Kipling and Aesop's fables as our main source of story.  
Traditional Indonesian shadow puppet
Students from each class are working in groups. Each group has its own story and each student is creating a character within that story. 

The first step was for students to read the stories aloud and identify who the characters are and who would create each character. They also summarized the story.  Next, students learned about the words characteristic and trait, and they brainstormed four characteristics their puppet would have. 


Next, the students created a sketch for what they thought their puppet could look like.  Some students used pictures of animals as a reference.   I also talked to students about how they should plan ahead of time, and be thinking about which part of the puppet would move. 


Students showed their thinking and plan for how their puppet will move by drawing circles to indicate where they will use paper fasteners to create a movable joint.  


Currently, the students are drawing their design on thicker card stock, being sure to draw their moving parts separately.  The students are doing a lot of problem solving to create successful puppets.