Showing posts with label sculpture. Show all posts

Sunday, July 1, 2012

Architectural Sculptures


As their last project for the year, students in 4th Grade created sculptures that were based on geometric forms and architecture.


First in order to begin thinking about architecture and public sculpture, I showed the students several slide shows of how sculptors and architects use drawing and collage to sketch out and play with ideas.  

Next, I xeroxed drawn forms, as well as pieces of architectural structures such as domes, arches and columns. Students then added to and combined different aspects of the xeroxes, in order to create an idea sketch for a new building or public sculpture.


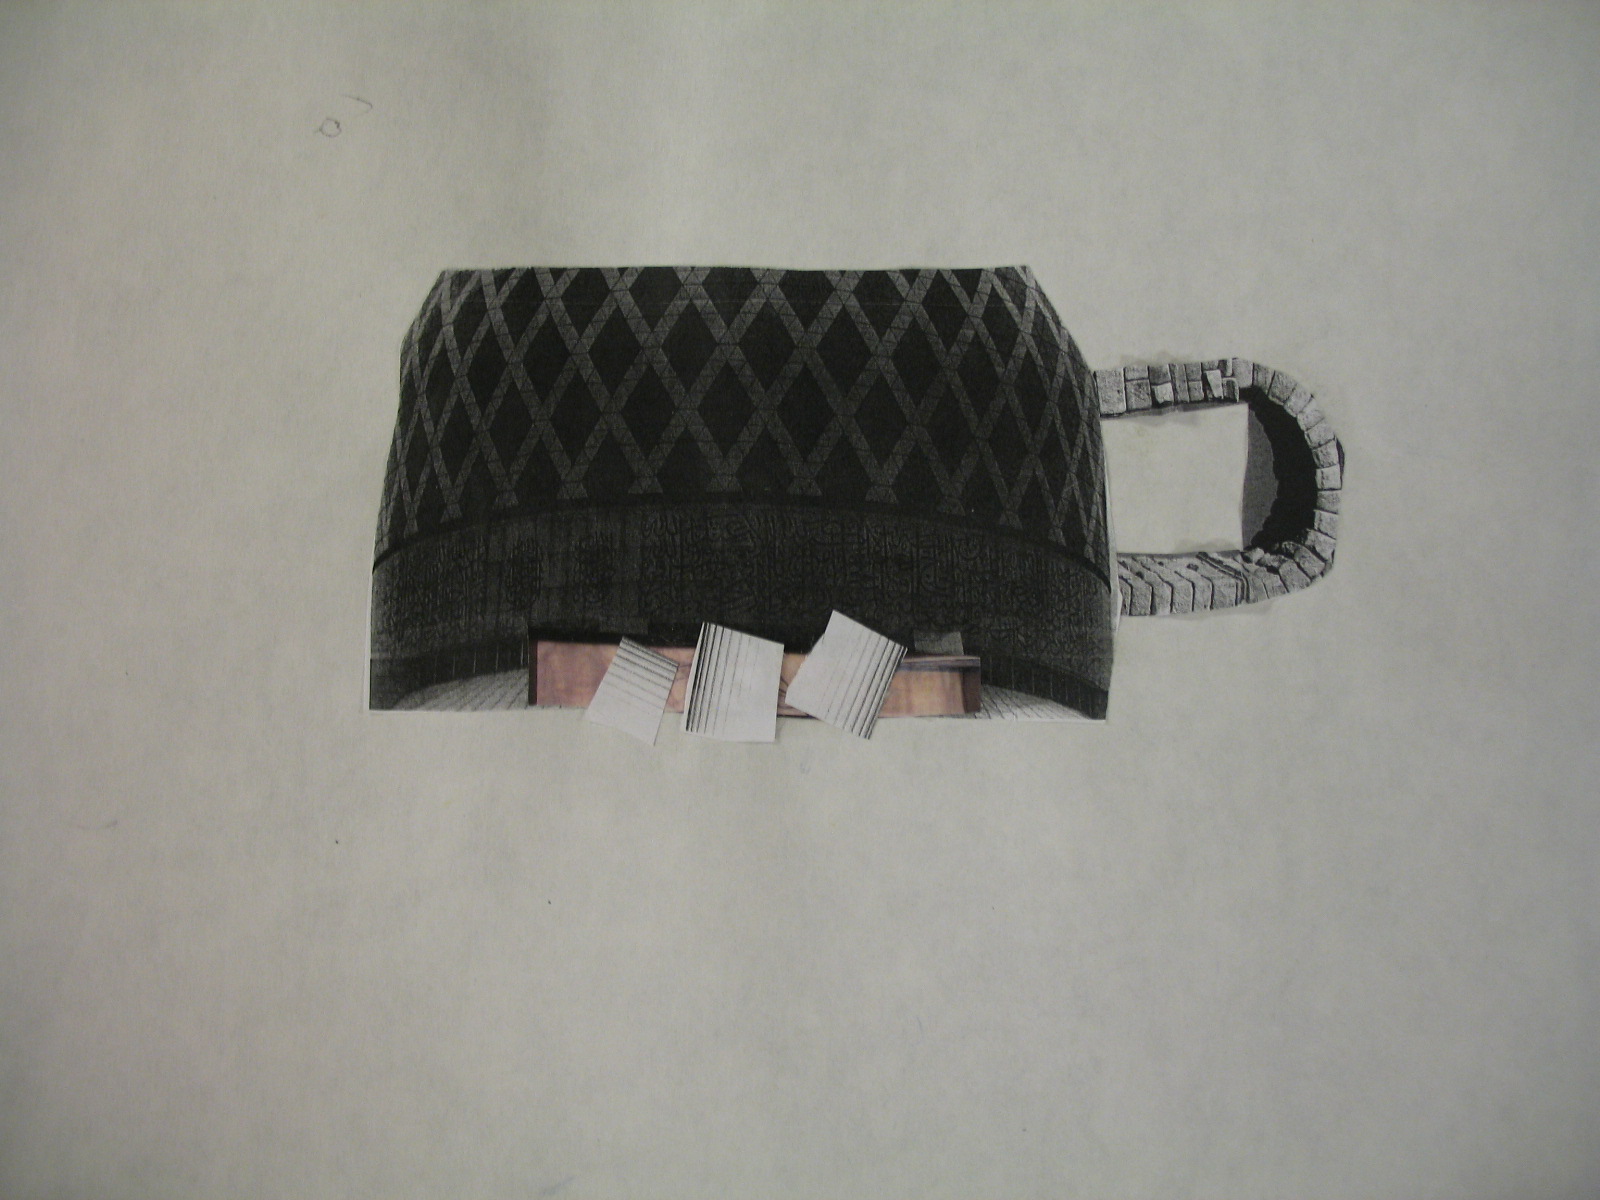
This student's idea and building design is based off of the form of a mug. He combined a dome and an arch, and cut up some columns as well.

Next, students chose one of their sketches to base their sculpture off of, and began building using cereal boxes and found forms such as paper towel tubes. They also had to include at least one geometric form (cube, pyramid, cylinder, or rectangular prism), which was built using a net. They traced this net and created their form, getting practice that helps reinforce concepts on the ISAT math test. 


After building all of their forms and joining them with masking tape, students were taught about paper mache, and how it is a great permanent attachment tool.   
Students added paper mache (glue+paper pieces) to secure the places where two forms connected.


You can see how this student utilized many found forms.


Next, the students and I talked about how architects need to really sell their idea to contractors and the public, before it can be realized.  In order to do this, they add "skin" to the models they have created, to give their audience an idea of the colors, textures, and building materials, that will appear on the building.

Students had access to acrylic paint (painting station), as well as many other materials in the sculpture studio, which they selected to show what textures and colors they wanted on their public sculpture/building. 

I forced all of the students to apply a base coat of paint to their sculpture, before gluing on extra materials such as paper, feathers or fabric.  In this way, the cereal box labels were covered up, and the overall craftsmanship was better.


I would love to see this sculpture larger than human size, downtown in Grant Park!  
I like how this student used the rubbing (texture) plates we had in an innovative way.  They embossed tin foil which was not a demonstrated technique. Yay for coming up with your own solutions!

In the end,  I think most students chose the materials they did for "skin" because they looked interesting or pretty, and not because these were real textures they would want on a building.
However, the resulting sculptures were pretty interesting and for the most part, the students liked their sculptures and were motivated to finish them.
It was also interesting for both the students and myself to see how their sculpture changed and morphed from their original design/collage.  This mainly happened because the students discovered that some things were too difficult to construct or attach in the time we had.

This student added cardboard people to show a sense of scale and building usage.
This student, Brody,  wanted to use organic forms to create their sculpture. They formed an idea without using collage and used drawing and imagined forms instead.  Although they ran out of time to truly add skin in a well-crafted way, their structure was huge and really well constructed and thought-out!

Brody's sculpture before adding paint and "skin"


This student used paint, wall paper, feathers and ribbon for skin.  I really like the novel use of straws as walls.

Masks from Paper Mache


Students in grades 7-8 made masks as their last project of the year.  The 8th graders chose whether they wanted to use clay or paper/tape for their armature.  The 7th graders all used paper, cardboard and tape to construct their armature.  All students were encouraged to select a reference photo to sculpt from.


After looking at images of a variety of masks from around the world, the students chose to create an animal (spirit animal or realistic), or a person for their inspiration. 


Students had access to sculpture materials in bins, which they could use to help form their armature.  This student utilized cardboard tubes for her eyes.

This student used plastic caps as part of her armature for the eyes. 

 After the artists used clay or cardboard to create the shapes they needed for their animal or human mask, they then learned how to apply paper mache, and added 3 layers of colored thin paper+glue to their mask.  For you teachers or crafters our there, I bought "Art Paste" from Blick art supply because it is non-toxic but also more permanent than flour and water.  The paper we used was the same kind as that used for bulletin boards in schools (on a roll). I had the students keep track of how many layers they had applied by making each layer a different color of paper.

This mask began with molding clay into the shapes the artist wanted, before adding paper mache.


 Next, I went over the basics of color mixing, having students create secondary colors, as well as tints and shades from the primary colors.  They then painted their masks as they saw fit, mixing most of their colors from primary colors and white.
Below are some of the great masks that resulted. 


Before we painted them, we pulled out and in some cases ripped with gusto the paper and/or clay armatures from underneath the paper mache.  All that was left was three strong layers of paper mache which had taken the shape of the armature.


Sunday, April 29, 2012

Sculptures from recycled materials


Students in grades K-1 worked on sculptures made from recycled materials, throughout the month of March. 

To begin the process, the kids an I looked at sculptures by several artists who work with recycled and found materials, and we discussed why an artist might want to use recycled materials.  Specifically, we focused on the work of outsider artist Emery Blagdon, who makes very cool hanging works of art using the things he finds and has around.
Next, students envisioned what a toilet paper tube could become by taking turns using an overhead projector to draw on a transparency.  This helped the ideas start flowing.  As a final envisioning step, students drew up an individualized plan using pencil for how they wanted to transform their recycled form. 


Look at the long legs on this person/robot!

Through the making of this project, students learned about what it means to attach, and how sculptors attach and build using many different materials.  They learned that some forms of attachment work better than others when using certain materials.   Students also learned that sculptures have "bones" that are the supporting structure, and "skin" that gives the sculptures color and texture.

I had the room set up in such a way where students could access their own building materials in a "sculpture studio".  I had one bin for thin cardboard, one for cardboard tubes and cartons, one for foil, and another for plastic forms.   Over two classes, I demonstrated three different forms of attachment: tape, glue, and tie and sew (sewing with pipe cleaners), and we had stations set up around the room where students could any or all of these methods of attachment for both the bones and skin of their sculptures. 


When we did move on to attaching "skin"(texture and color) to the sculptures, students accessed those materials as well, choosing from a variety of things in containers that were above the building materials. 


As a class, we discussed all of the wonderful things around the classroom you can use for skin.  You can use drawing materials, fabrics, tissue paper, buttons, feathers and more.  The kids took advantage of all of these resources, and did so with a discerning eye, as they figured out how to express their idea and transform their recycled plastic or cardboard cylinder into something else entirely. 

I really encouraged the kids to cover up all of their tape and cardboard with skin, so that it would look finished, and so they could keep the mystery as to how they built it.

As a last step, parents helped hot glue the sculptures to cardboard bases.

This particular one has a lot going on the more you look!


We heart googly eyes!

The Kindergarten student who made this horses neck, did so originally out of tin foil, and later on adding the brown tissue paper as skin. She used sewing with pipe cleaners as a form of attachment.  


Tin foil helped robots look like robots.  Note: some things did need to be hot glued on with the help of an adult!

This student added extra details and color to her base, to further express her idea.


As you can see the kids did a wonderful job of completely transforming a recycled form into a new and exciting sculpture.


A very special thank you to all of those parent volunteers who helped the students express their idea and be independent in the studio, as they manned the glue gun and helped students to problem-solve.  Also, thank you to Kitty Conde who gave me the idea and suggestions for this project.